

THE WATER BOX
The Water Box is a hidden shower and wash basin located next to the slider door. The Water Box is intended to be a dedicated washing and showering station, and it is also an ideal spot to use and store your portable toilet, however this is not mandatory, and it is up to you where you would like to store your portable toilet.
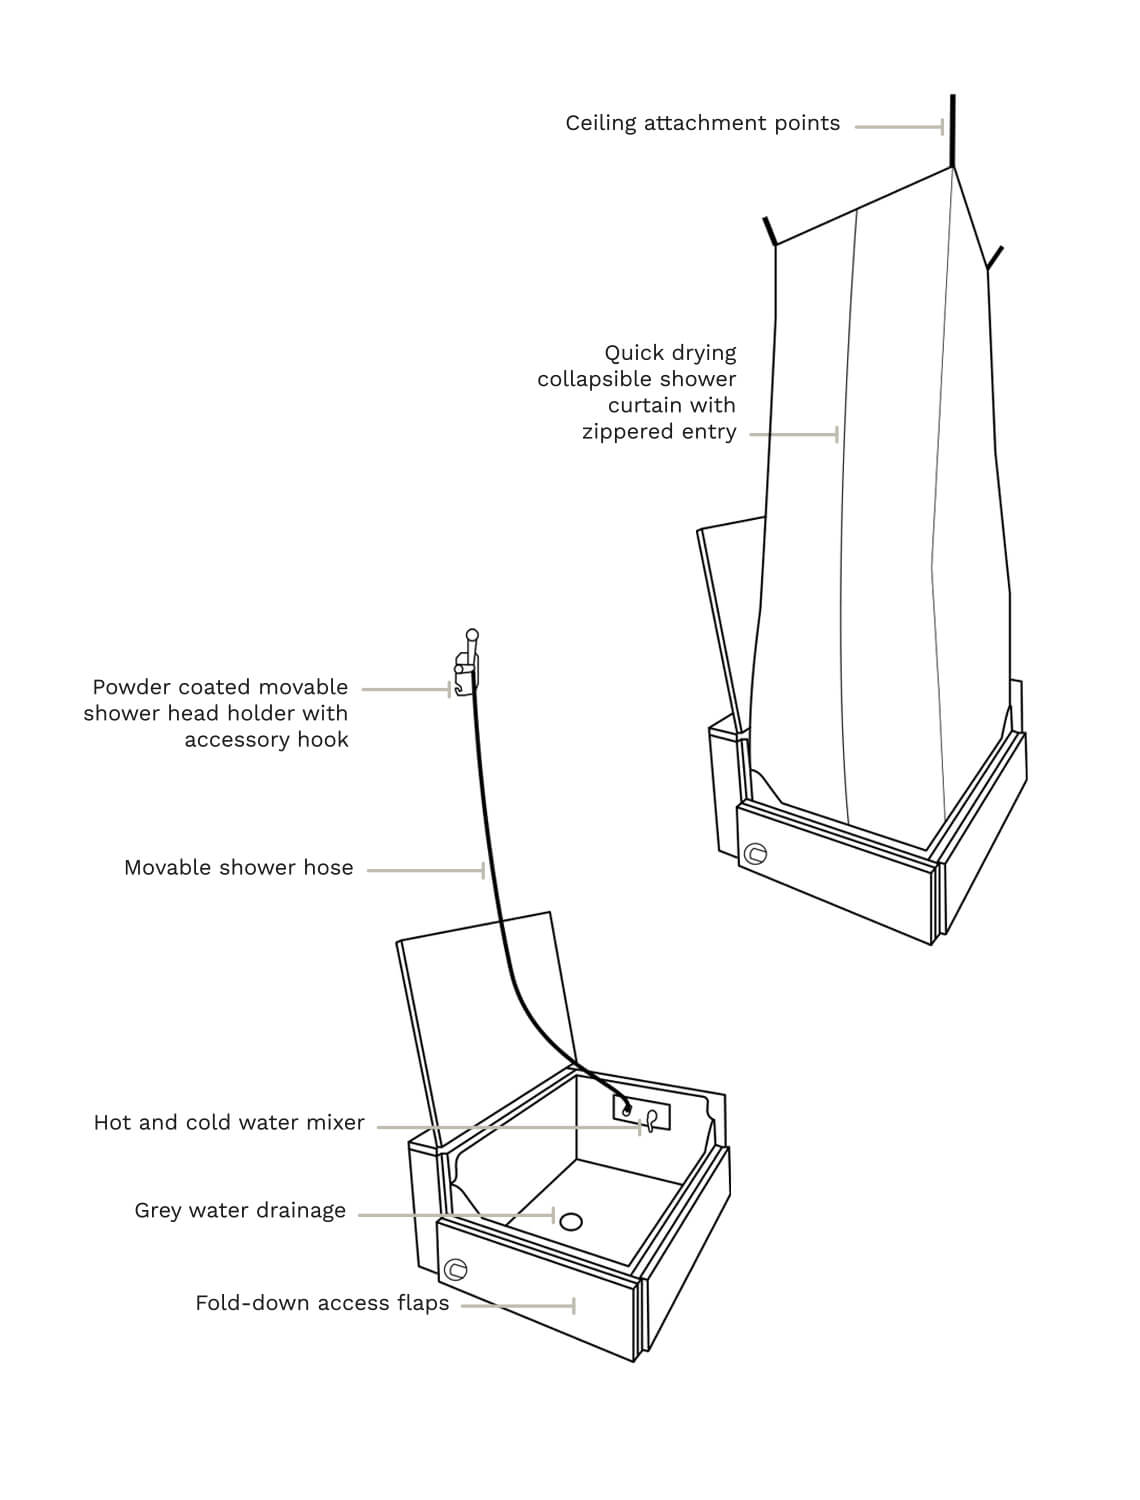
To access the Water Box, first remove the seat cushion and open the flip top panel of the bench seat. Also flip down the two panels on either side of the water box for easier access to the wash basin. Inside the Water Box, there will be a shower hose, shower caddy, shower curtain, and a portable toilet.
Remove all items before setting up the shower. To remove the shower caddy, unscrew the mounting point by turning the knob counter clockwise until it releases tension from the mounting plate, allowing you to slide the mount off the L-Track button.
The first time you setup your Water Box shower is crucial for future ease of use. This is where you will determine the ideal locations for the curtain and shower caddy depending on your needs and may require multiple uses to get the exact configuration your prefer.
The first step will be to setup your shower curtain. Open the shower curtain bag and unfold the shower curtain. At the top of the curtain are rigid bars that will help give structure to the curtain when deployed. There will be four straps with clips that are attached to metal L-track rings that will be used to secure the curtain to the van.
Locate the flap at the bottom of the curtain that aligns with the shower mixer location, and rotate the curtain accordingly to correctly line it up with the Water Box.
Next, attach the two side wall L-track rings to the L-track located on the upper portion of the passenger side wall. To attach the rings, grip the L-track attachment with your index and middle finger, and use your thumb to press open the mount. Line the disc up with an open L-track slot, insert the disc, and slide the mount over along the track until it locks into place. These two mounts should be placed as wide apart as possible and centered over the water box.
Now, attach the two ceiling L-track rings to the L-track buttons located on the ceiling. Once attached, you can pull the clips to adjust tension of the curtain. Once you have the curtain placed in the ideal spot, you are able to leave the L-track rings attached to the ceiling and wall and use the fast clips to quickly attach and detach the curtain for future use.
Finally, locate the snaps at the bottom of the shower curtain and secure them to the water box basin. Your shower curtain should now be fully attached and ready for use.
The next step is to mount the shower caddy. The exact location is up to personal preference, but we suggest mounting the caddy centered along the passenger side wall. To mount the caddy, insert the mount into an open L-track spot and slide into place. Tighten the knob to secure the caddy to the L-track. Next, take the shower hose and secure the shower head to the caddy.

To attach the hose, locate the shower hose connector located on the mixer in the shower box. Firmly push the hose into the connector until you hear a click. To detach the hose, depress the button located on the top of the connector to release the hose.
From here, make sure your water pump and water heater are turned on. Next, remove the cover from the MaxxAir vent fan and turn it on to ventilate any excess humidity. Please see our video on how to use the heater and fan for more details on how to adjust these components. Gently lift up on the shower mixer and adjust between hot and cold for the ideal temperature. Enter the shower, and zip down the shower curtain to create a fully enclosed and waterproof space. To use the shower, depress the lever on the shower head for momentary streams of water, or lift up on the lever to lock it up for a steady stream of water. Please monitor water tank levels before and after showering to gauge water usage.
There is a pump attached to the Water Box that will automatically expel excess water caught in the basin, though depending on how level your van is, water may pool up. If manual pump usage is needed, please use the pump rocker switch located on the passenger side wall of the van to turn the pump on manually. The water from the shower box drains into the grey water tank.
When your shower is complete, allow the curtain to drip dry into the basin before storage. If you need extra room, you can detach the curtain from the ceiling mount points and fold it over on itself for a more compact drip drying process. Once dry, fold the curtain back up into its bag, remove the shower head from the caddy, and store everything back the Water Box.